Throughout this year I have been developing my skill at sculpting, this began with some humble additions to existing figures to more recently attempting to change the entire look of a miniature, the general impetus for which has been to bring the existing Perry figures into the early 1500's for my French and Tudor armies.
As a result I've created some rather unique figures. They take a while to do as essentially I will keep at something - an shoulder, arm or whatever - until I feel it's right, thus with each figure I further my abilities and learn some methods or tricks along the way, what works and what doesn't.
I'm in no rush either so they quietly develop at a slow pace in the background, I've found it's also a break from painting as well as in itself inspiring me to paint so it's win win.
This small offering of 3 figures has been worked upon over the last few months. These are additions to my existing missile foot which, if you compare you can see the development of the sculpting from start to now, you can see how I sculpted the previous missile foot figures here.
In this base I experimented with representing a Swiss and an Italian, or rather, those were my influences while sculpting. There's also a French chap there too. Here I began with the French chap, then Italian and then Swiss, just across those 3 you can see a modest progress in my ability.
It is all trial and error, anyone can do it, you've just got to start.
First up is a French inspired arquebusier;

I sculpted this one quite some time ago so he's fairly modest in comparison to the others. This sculpt involved cutting and filing the livery jacket off the plastic figure then re-sculpting the top of the hose and creating a cod piece. In addition I then added the points for fastening, shirt pulled through at the bottom and puffed up the shoulders. I'm fairly happy with it, I later mastered puffed shoulders with the Swiss figure below and perhaps a bare head with cloth cap may have worked better but he'll pass muster.
Next we have an Italian inspired sculpt;


In creating this figure I felt I crossed a threshold in my ability, as essentially I had to sculpt all of the clothing using a Perry Ansar as my starting point;


To begin I cut then filed away the loincloth, I then sculpted the shirt, using the existing necklace as the shirt collar, this worked quite well. Following that I added the base coat, shoes, arms (both also from the Ansar sprue) and finally the head. This was an Ansar head to which I added hair and a cloth cap. I cut an arquebus in half and glued to the arm. I'm not too sure about the position of the left arm but not bad overall, there's some good movement in this one and I was particularly pleased with the voluminous shirt sleeves.
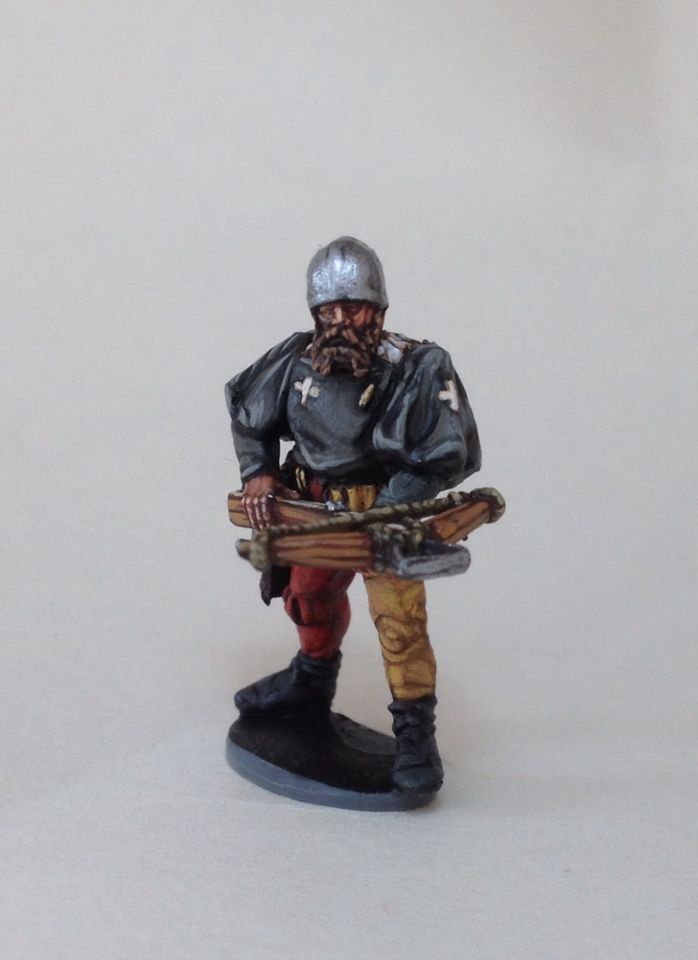
Finally the Swiss inspired Crossbowman;


This is perhaps my favourite yet. As with the first I began by filing away then re-building the waist, I didn't quite file enough of the rear but not bad nonetheless. The torso began with the undershirt, then the doublet with eyelet fastening showing on the top right and finally the arms and beard.
One key advance here was a tremendous tip; use e45 for moisture rather than water. It helps to have some moisture as you go to keep the flow of the putty pushing and to help achieve the forms you are trying to create, whilst it is possible with water the use of e45 or petroleum jelly just makes it a whole lot easier, you need the tiniest amount, minuscule even but it will honestly revolutionise what you're doing and make it a lot easier.
So here's the complete base, a rag tag bunch just right for French adventuriers with mercenary tag alongs;

Here they are with the rest of their unit, the basing of each stand is on the notion of their engagement in fire and manoeuvre, I'm not sure if that is perhaps a modern tactical application but it looks good for skirmishers.

Apologies for the quality of these photographs, my digital SLR died last week, a very sad occasion, suggestions on a good mid range replacement are most welcome.

I chose an at ease pose for this build, he will stand next to the standard bearer and either another crossbowman or possibly a halberd armed chap.
That's all for now, just 3 figures but progress nonetheless and some momentum with the green stuff, it gets easier with practice, Picasso says it better; 'Inspiration exists, but it has to find us working'.
All the best
Stuart
Excellent Stuart, love the crossbowman
ReplyDeletePete
Each figure is splendid, excellent job!
ReplyDeleteThese are superb figures, I know how much work you have put into them. They capture the 1510s perfectly.
ReplyDeleteI am still eagerly awaiting the release of your own early 16th century range!!
Really impressive. I love the attention to detail. Quite inspiring.
ReplyDeleteBeauiful
ReplyDeleteThey are wonderful - perhaps you should offer to "sub-contract" a range for the Perries?
ReplyDeleteLovely work
ReplyDeleteReally good, like the Swiss chap best, but all great! Iain
ReplyDeleteThey look great!
ReplyDeleteNice conversion work. I had to do the same thing to be able to match all the arms to torso for my Genoese (Perry European) Crossbowmen.
ReplyDelete